Setting up Visual Studio Code for Haxe Development - Hello World on Mac
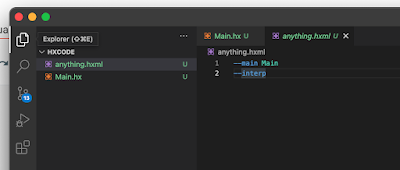
Was thinking of doing some game development after 6 years. Got a lot of hope seeing how Haxe and OpenFL seemed to provide solutions for old AS3 projects. But just to get the Haxe 'hello world' running on VS Code on my Mac wasn't documented anywhere. So I'm writing it here hoping it helps some others. First install Haxe on your Mac (normal installer). I didn't know how to use the binaries alone. Get VSCode Install the Haxe and Lime extensions on VSCode. Open a new project folder, create a file called Main.hx. Paste the code given from this page . Next create a file with .hxml extension in the same folder and paste two lines of code shown in the screenshot below. (more info ). Click 'Run without debugging' See the output in the debug console below (not terminal or output tab) Next I'm off to getting an entire old AS3 project with SWF assets working. If I succeed I'll post more.